Wednesday, September 24, 2014

Shredded Beef Verde Tacos


 Every time that I have Mexican food, I remember how much I love it! I came up with a weeknight taco recipe so that when I came home I could indulge in some delicious shredded beef tacos!

Ingredients: (This recipe is just for the beef taco filling, make sure to also purchase taco shells and other various toppings!)

3-5 lb pot roast
1/2 purple onion
3 cloves of garlic
1/8 bunch of fresh cilantro
1 jar of salsa verde

Directions:

Chop up the purple onion and garlic.


Place the pot roast in the crock pot. Top with the garlic.


Then top with the purple onion, salsa verde and top with the cilantro.


Place the crockpot on low for 6-8 hours.


Take the beef out of the crock pot and shred with a fork. Throw away any fat.


Now here is the fun part! Use the beef as your taco filling and top with your favorite ingredients! I used my left over taco meat for taco salads the next night! Yummy and easy!


Thursday, September 11, 2014

Cinnamon Bun Smoothie


This recipe is super easy for a busy work morning! The first time I made it, my boyfriend asked why I didn't make him a double, that's how good it was!

Ingredients:

3 ice cubes
1 packet of Quaker weight control maple & brown sugar instant oats
1 teaspoon of vanilla extract
A dash of cinnamon
1 1/2 cups of milk (I used silk vanilla milk for extra flavor!)

Directions:

Place all of the ingredients in the blender. Place the blender on "smoothie" option for about 1 minute or until it is well blended. Pour into a cup or mason jar and garnish with another dash of cinnamon! Yummy!


Monday, September 8, 2014

Mac and Cheese Bar !!!


Nothing beats any type of food bar for any type of party! I had a ladies night the other night and made a mac and cheese food bar, because honestly, who doesn't love mac and cheese? Especially when it's loaded! For the cheese sauce I used Ragu double cheddar sauce, a little bit of milk and a mixed shredded cheese. I kept it in the crock pot so that it stayed warm throughout the night. There are endless toppings that taste great on mac and cheese so I narrowed it down for my mac and cheese bar. I also printed out some recipe examples in case anyone was stuck on what type of combination to make. 
 Feel free to be creative and have fun!


Sunday, September 7, 2014

Bruschetta Chicken over Roasted Veggies


What a delicious and healthy meal! This definitely curbed my appetite for Italian food! I wasn't even missing pasta when I ate this! With buying the bruschetta instead of making it myself, I was able to save a lot of time on my busy week night!

Ingredients:

1 lb of chicken tenders or thin sliced chicken breast
1 bunch of asparagus
1 purple onion
1 ball of mozzarella cheese
1 container of bruschetta (I used the Trader Joe's brand and it was delicious!)
1 tablespoon of EVOO
Fresh basil leaves for garnish
Salt and pepper for garnish

Directions:

Pre-heat your oven to 400. Chop the asparagus in half and chop up your purple onion. Place the asparagus and onion, along with the EVOO drizzled on top in a casserole dish and place in the oven.The vegetables will need about 35-40 minutes to cook. Next, grill up your chicken. While your chicken is grilling, warm up your bruschetta and thinly slice your mozzarella. Once the chicken is finished cooking, top with thin slices of mozzarella and top with the bruschetta. Plate up with the vegetables underneath and garnish with fresh basil leaves, salt and pepper. Dig in and enjoy!


Thursday, September 4, 2014

Tomato and Onion Quiche


Nothing beats a nice homemade quiche on a Sunday morning! Feel free to be creative and use what ever vegetables and cheese you want or have on hand!

Ingredients:

1 Pillsbury pie crust
4 eggs
3/4 cup of milk
1/4 cup of cream
1 onion
2 tomatoes
Italian seasoning
Salt
Pepper
1 cup of desired shredded cheese
1/2 tablespoon of EVOO
Non-stick pray

Directions:

Preheat oven to 375. Take a medium sized frying pan, and place 1/2 tablespoon of EVOO and place on medium heat. Dice up your onion and place into the frying pan. Allow the onion to cook until it is cooked through. While your onions are cooking, dice up 1 of the tomatoes and set aside. In a mixing bowl, add your eggs, milk, cream, a dash of Italian seasoning, salt and pepper and whisk until well blended. Mix in your diced up tomato, 3/4 cup of cheese and cooked onions to the mixing bowl and stir well. Spray your pie tin with non-stick spray. Lay out your pie crust to evenly fill the pie tin. Fill the crust with your egg mixture. Place in the oven for 40 minutes. After 40 minutes, take your quiche out of the oven. Slice your second tomato thin and use it to make a design on your quiche. Sprinkle with the remaining 1/4 cup of shredded cheese and place it back in the oven for 10 more minutes. Take the quiche out of the oven and allow it to sit for 10 minutes before cutting and serving. Enjoy!


Tuesday, September 2, 2014

Pumpkin Mini Bunt Cakes with Cinnamon Cream Cheese Frosting


I made these for my boyfriend's mothers birthday and they were delicious! If fall had a taste, these would be it!

Ingredients:

For the Cake:

1 package of super moist carrot cake
3/4 cup of water
1 can of pumpkin (15oz)
Mini bunt cake pan
Non-stick spray

For the Frosting:

2 cups of confectioners sugar
4oz of cream cheese (don't use fat free)
1/2 teaspoon of vanilla extract
1 teaspoon of ground cinnamon
2 tablespoons of cold cubed butter

Directions: 

For the cake:

Preheat your oven to 350. In a large mixing bowl, mix together the carrot cake mix, water and can of pumpkin. Mix well until it is well blended. Spray your bunt cake pan with non-stick spray. Fill them half way with the mixture. Place in the oven for 20-25 minutes or until it passes the toothpick trick.


Allow them to cool for about 5 minutes before placing them on a cooling rack. I used a butter knife to gently remove my cakes from the pan. Allow to fully cool before frosting them. This recipe should make about 9 mini bunt cakes.

For the Frosting:

Add all of your frosting ingredients in a medium sized mixing bowl. Blend with a hand mixer. Start at a slow speed and slowly increase the speed until it is a frosting like consistency.


Once the frosting is well mixed, place in a large ziplock bag.Cut a small edge off the tip of the bag and gently squeeze the frosting out on to the cakes with your desired design. Be sure to keep the frosting refrigerated because it has cream cheese in it! Serve and dig in!


Tuesday, August 26, 2014

Blueberry Pie Bars


I made these last night and they were finger licking good! You can cut them up as bars, slices of pie orrrr just dig in with a spoon like I did!

Ingredients:

For the crumb part:

1 cup of sugar
3 cups of flour
1 tsp of baking powder
1/2 tsp of salt
1 egg
1 cup of cold cubed butter

For the filling part:

4 cups of fresh blueberries
 tsp of vanilla extract
 tsp of corn starch 
1/2 cup of sugar

Directions:

Preheat your oven to  375. In a mixing bowl, add the 1 cup of sugar, 3 cups of flour, 1 tsp of baking powder and 1/2 tsp of salt. Mix well. Cut in the cold butter and egg. The dough will be crumbly.


Next, make your filling. Add the blueberries, corn starch, 1/2 cup of sugar and 1 tsp of vanilla extract in a mixing bowl. Gently mash and stir the ingredients until they are well mixed.

Spray a 9x13 pan with non-stick spray. Take 1/2 of the dough mixture and layer it flat in the pan. Next, layer your filling mix on top. Top off with the remaining dough mixture. Cook in the oven at 375 for about 45 minutes or until it is golden brown and bubbly. If you are serving this warm, vanilla bean ice cream is the perfect topper! If you are cutting them into bars, let them cool completely before cutting them.


Tuesday, August 12, 2014

No "crab" rangoons


Ingredients:


I love crab rangoons. I could absolutely eat them once or twice a week but my jeans wouldn't fit! I created this version to help feed my craving! I'm not a fan of imitation crab meat, so I left out that ingredient. If you like it, add it in!

- 8 oz of fat free or 1/3 the fat cream cheese
- 2 wedges of laughing cow cheese (I used the French Onion kind)
- 1/2 of a medium white onion diced
- 2 Tablespoons of sugar
- Pinch of garlic powder and onion powder
- 1/2 bunch of scallions sliced thin
- 1 tsp of low sodium soy sauce 
- 1 package of nasoya wonton wrappers per batch (you can find them in the tofu section of the grocery store)


 Directions:


Combine all of the ingredients except the wontons in a bowl and let it sit out until soft (about an hour). Mix well. Preheat oven to 375.


Lay out a wonton wrapper and fill it with 1/2 tbsp of the mix. 


Wet the edges and seal them together to make a triangle.Make sure you have a tight seal so that the filling doesn't pour out while cooking.

Fold over the edges.

Continue for the rest of the wrappers. Spray a cookie sheet with pam and lay down the wontons. Spray the tops with pam so they can get crispy.
 

Place in the oven for about 12 minutes or until crispy. Be sure to flip them 1/2 way through so they can evenly get crispy. Enjoy!


Monday, August 4, 2014

Asian Beef Stir Fry


I love any type of Asian inspired meal! This makes for a great weeknight meal. Most of the work is done in the prep the night before.

Ingredients:

1 lb of flank steak
1 orange pepper
1 yellow pepper
1 red pepper
1 vidalia onion
1 bunch of green onions
2 cups of instant white rice
1 tablespoon of sesame oil
1 tablespoon of stir fry seasoning or sauce
3 tablespoons of your preferred Asian inspired salad dressing or marinade ( I used archer farms lemon ginger sesame salad dressing)

Directions:

24+ hours prior to cooking:

Chop up your peppers and onion to desired size. Place them in an air tight tupperware or large ziplock bag. Add the sesame oil and stir fry seasoning. Mix well. Set aside in the refrigerator for marinating for 24+ hours. Next, thinly slice the steak to your desired thickness. Place in an air tight tupperware or ziplock bag. Add the 3 tablespoons of Asian marinade and mix well. Set aside in the refrigerator for 24+ hours.

Next day:

Most of the work was done yesterday, so now lets cook up this delicious meal and enjoy! Set the oven to 400 degrees. Place the vegetable mixture in a casserole dish and place in the oven for 30-45 minutes or until the vegetables are cooked through. Next, fire up the grill. Allow it to warm up for about 5-10 minutes. While the grill is heating up, slice up the green onions for topping and set aside. Now that your grill is warmed up, place the steak on the grill and allow it to sear on one side. Flip when the steak is about 80% cooked. Now everyone has different ways they like their steak cooked, from rare to well done (in my opinion, why even eat steak if you're going to have it well done - but that's a different story!) Anyways, cook it the way you like it based on the thickness of your steak. When it is finished cooking, set aside. Your vegetables should be just about done by now. Cook the minute rice according to the instructions. I use the minute rice cups (I'm lazy but whatever). Plate up the rice. Top it with the vegetables, steak and top with the green onion. Yummy!


Monday, June 2, 2014

Thai Coconut Curry Chicken with Jasmine Rice


This is one of my easiest, most delicious recipes! I just gave the recipe to my friend and she loved it! The good part is, it is just as delicious re-heated so it makes for a good lunch for work. The pictures don't do this meal justice. Just trust me it's amazing!

Ingredients:

3 Tablespoons of yellow curry sauce
1 can of coconut milk
1 tomato
4 garlic cloves
4 tablespoons of butter
1-2 lbs of chicken thighs
Green onion for garish
Your choice or rice to serve it over ( I used Minute Jasmine Rice)
Red pepper flakes for garnish if you want a kick


Directions:

You will need 2 separate frying pans, 1 medium and 1 large. Add 2 tablespoons of butter to the medium frying pan and 2 tablespoons of butter to the large frying pan. Put both on medium heat. While the butter is melting, chop up your garlic cloves into small pieces along with the onion. Add the garlic and onion to the medium frying pan and stir well. Next, take the curry sauce and coconut milk and add them to the large frying pan. Stir well. Bring this to a boil. While this is warming up, cube up the chicken thighs into 1 inch by 1 inch sized pieces. Also be sure to trim off any unwanted fat. Chop up your tomato. At this point, the onion and garlic should be well cooked. Add this mixture to the large frying pan with the curry mixture. Next, add the cubed up tomato and chicken. Keep this covered at a low boil for about 30 minutes or until the chicken is cooked through. Serve over your favorite rice (I used minute rice because I work full time!) Garnish with chopped green onion and red pepper flakes in the picture below. Enjoy!


Saturday, May 24, 2014

Sweet BBQ Turkey Meatballs


Looking for an absolutely easy recipe to bring to your next summer cookout? This is the one! The crock pot does all  the work while you can sit back, enjoy the sunshine and drink a cold beer :)


Ingredients:

(1) 32. oz bag of frozen turkey meatballs
(1) 18 oz jar of grape jelly
(1) 18 oz container of honey BBQ sauce (I used sweet baby rays)
Green onion if desired for garnish

Directions:

Place the crock pot on low heat. Add the meatballs, grape jelly and bbq sauce. Mix well. Cover. Let them cook for at least 3 hours.

If you are cooking them ahead of time, after 3 hours, turn the dial to "keep warm." When you are ready to serve, garnish with chopped green onion!


Wednesday, May 21, 2014

Cheesy Ritz Chicken


My parents came over last night for the first dinner I made them at my new place. I wanted to make something tasty, but easy since I didn't want to spend the entire night in the kitchen. This recipe is perfect for a busy weeknight and makes for a very easy clean up. The total prep time for this meal is about 5 minutes - my kind of cooking!

Ingredients:

1.5 lbs of thin sliced chicken ( you should get about 6 pieces or so)
8 oz sour cream ( you can substitute light or low fat sour cream)
2 sleeves of reduced fat ritz crackers
1 bag of shredded cheese ) I used a mixed cheddar variety
Non-stick spray
Parsley for garnish
Greek seasoning (optional)

Directions:

Preheat the oven to 400 degrees. Spray a casserole dish with non-stick spray. Lay out the chicken breasts evenly on the casserole dish. Sprinkle them with greek seasoning, or any other desired seasoning. Spread a thin layer of sour cream on each slice of chicken.


Top each slice of chicken with an even amount of the shredded cheese and pat the cheese down lightly on each chicken breast.


Next, take the two sleeves of Ritz Crackers and mash them up until they are crumb sized. Use a heavy tool to do this (I used my garlic slicer.) Sprinkle the ritz on top of the chicken, covering completely. Place the dish in your preheated oven for 25-30 minutes. Some ovens cook faster than others, so be sure to cut into the chicken first to make sure it is cooked through. Garnish with fresh parsley. Serve with your favorite sides. I served this dish with a side of baked scallops and a garden salad. Delicious!


Sunday, May 18, 2014

125 Calorie Cinnamon French Toast


French toast is by far one of my favorite comfort breakfast foods. But at 464 calories and 16 grams of fat, Ihop's french toast is NOT worth it! Not to mention, they usually top it with sugar infused "fruit" and fatty whipped topping. It's so simple and easy to modify this recipe, and the best part is that it only takes a few minutes out of your busy morning routine!

Ingredients:

- 2 slices of Pepperidge Farm Light Oatmeal Bread (I use this bread and only this bread in my diet, it's magic at only 45 calories a slice!)
- 1/4 cup of fat free egg scramblers (you may need a little more, I just eyeballed it)
- a pinch of ground cinnamon
- a drop or two of vanilla extract

Directions:

Place a frying pan on a stove jet on medium heat and allow it to heat up for about 2 minutes (be sure to spray the pan with PAM.) Mix all of the ingredients in a bowl (excluding the bread) and mix well. Dip both of the sides of bread in the mixture then place in the frying pan. Repeat for the other slice of bread. Allow each side to cook for around 1 minute and flip. Allow around 1 minute for the other side. If both sides still aren't crispy, allow a little more time on both sides. Serve! You can top this with "I can't believe it's not butter" spray butter and light syrup... yum! Another idea is to top it with fruit (maybe strawberries) and fat free cool whip! I did the nutrition facts for 2 slices of french toast without any toppings. 

Nutrition Facts for 2 slices of French Toast without any toppings

Calories - 125
Carbs - 19
Fat - 1
Protein - 12
Sodium - 267
Fiber - 1

Pesto Chicken with Bruschetta Angel Hair Pasta


Angel hair pasta and Bruschetta go together like peanut butter and jelly. So don't me and Trader Joe's. If you don't have one in your area, find one and make a road trip out of it and stock up! I just love their products and their customer service! This recipe is based off of a few Trader Joe's ingredients, so if you are unable to get them, substitute with similar store products.

Ingredients:

1 tablespoon of basil ( I used the chopped basil cubes pictured below)
1 tablespoon of EVOO
1 lb of thin sliced chicken breast
1 lb of angel hair pasta
1 container of Bruschetta 14.5oz ( I used the Trader Giottos Bruschetta)
Shredded Parmesan cheese for garnish
Fresh parsley for garnish

Directions:

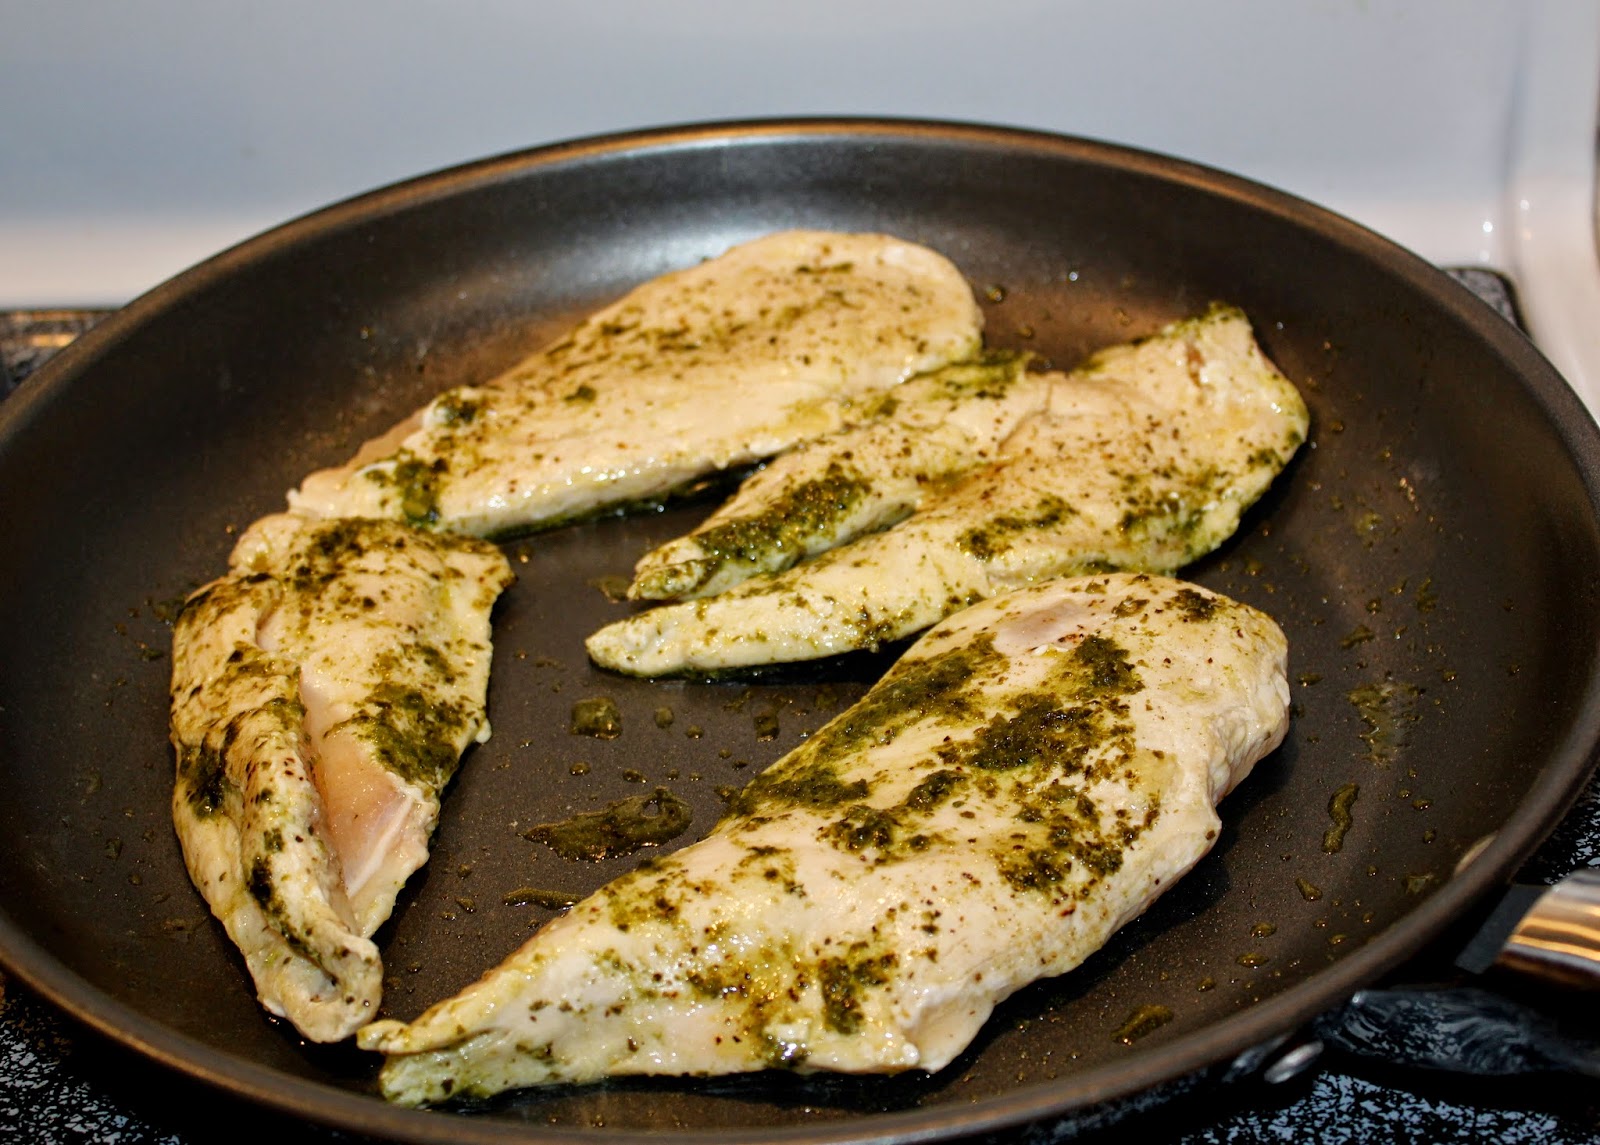
Fill a large cooking pot half way with water and place on high. Set your oven on 350. In a medium sauce pan, heat up the basil and olive oil on medium heat. Once it is ready for a sear, add the chicken. Below are pictures of the chopped basil that I love from Trader Joe's, its so easy to use and great to keep on hand!


Add the chicken to the sauce pan and allow it to sear on one side. Once it is well seared on one side, flip it and begin to sear it on the other side. Now that both sides are seared, place in a casserole dish that is sprayed with non-stick spray and place it in the oven. Cook for 20-25 minutes or until the chicken is cooked through.


Next, your water should be boiling by now so add the angel hair and stir occasionally. Rinse out the frying pan that you used for the chicken and add the whole container of bruschetta and place on low. Once your pasta is fully cooked, drain and rinse with hot water.


Add the pasta to the bruschetta and mix well with tongs like the picture below. Your chicken should be ready at this point.


Plate up with the pasta, then add the chicken on top and garnish with parsley and shredded Parmesan cheese!